Creating Homemade Bath Bombs for Fun Family Projects
Making homemade bath bombs is more than just a craft; it is a way to turn bath time into a magical, sensory adventure that everyone can enjoy. If you want a simple, fun way to add science and creativity to your home routine, follow this step-by-step guide to create bath bombs bursting with color and fizz.
Table of Contents
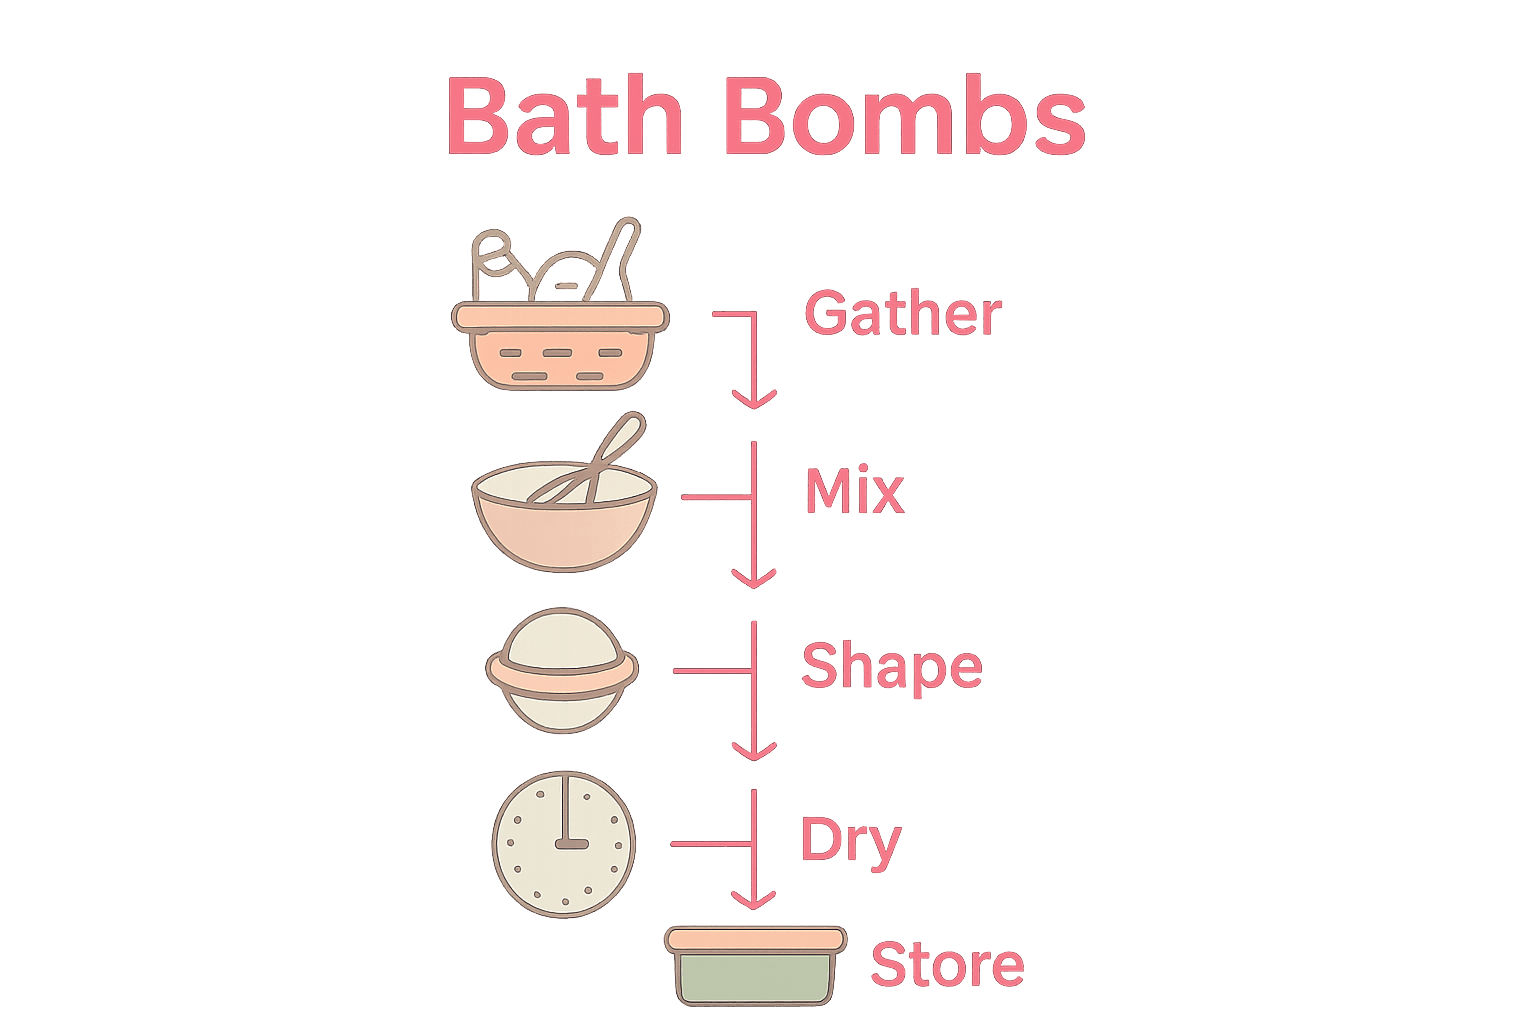
- Step 1: Gather Essential Ingredients And Supplies
- Step 2: Mix Ingredients For Perfect Consistency
- Step 3: Shape And Mold Bath Bombs With Kids
- Step 4: Dry And Set Bath Bombs Safely
- Step 5: Test And Store Finished Bath Bombs
Quick Summary
| Key Point | Explanation |
|---|---|
| 1. Gather all essential ingredients | Collect baking soda, citric acid, cornstarch, Epsom salt, food coloring, and essential oils for bath bombs. |
| 2. Mix dry and liquid ingredients carefully | Combine dry ingredients before gradually adding the wet mixture, ensuring it achieves the right consistency. |
| 3. Pack molds tightly to shape | Fill molds firmly, allowing kids to express creativity with colors and designs for their bath bombs. |
| 4. Allow bath bombs to dry completely | Let the shaped bombs set for 12 to 24 hours in the molds for best results and structural integrity. |
| 5. Store in airtight containers | Once dry, keep bath bombs in airtight containers to maintain their fizzing capabilities and prevent moisture exposure. |
Step 1: Gather Essential Ingredients and Supplies
Ready to turn your kitchen into a fun bath bomb workshop? First up is collecting all your magical ingredients and tools. According to Childs Science, you will need several key components to create spectacular bath bombs that will make bath time super exciting for your whole family.
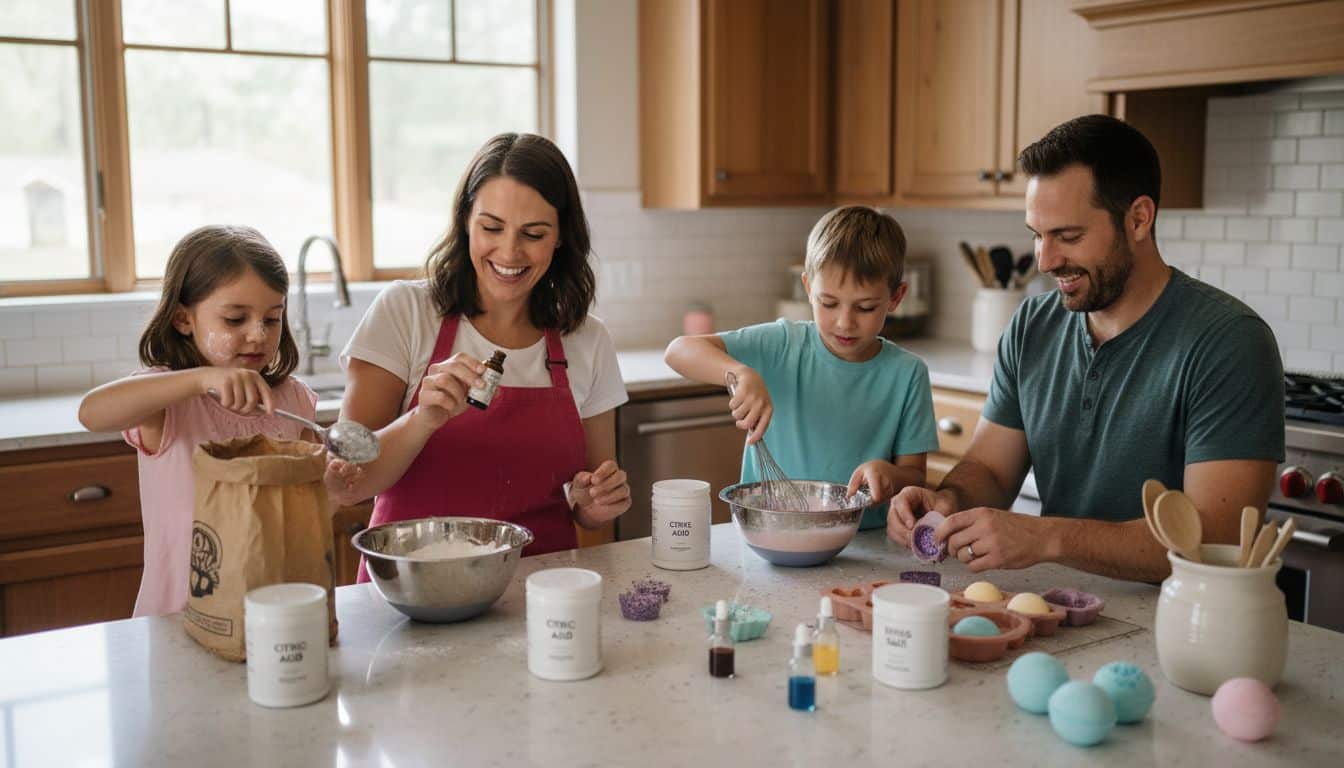
Your essential ingredient list includes baking soda, citric acid, cornstarch, and Epsom salt. These powdery ingredients are the secret to creating that awesome fizzy reaction. For color and scent, grab some food coloring and your favorite essential oils. As for tools, you will want measuring spoons, a large mixing bowl, a whisk or spoon for stirring, and silicone molds (or muffin tins) to shape your bath bombs.
One pro tip before you start mixing: make sure all your ingredients are completely dry. Even a tiny drop of water can trigger the fizzing reaction too early and ruin your bath bombs. Keep everything moisture free and you will be on your way to creating awesome bath time surprises that will have kids squealing with excitement. Get ready to mix some bath bomb magic!
Step 2: Mix Ingredients for Perfect Consistency
Now comes the exciting part mixing your bath bomb ingredients into magical fizzy perfection. According to Childs Science, the key is to add liquid ingredients gradually and observe the mixture carefully to prevent premature reactions.
Start by combining your dry ingredients in a large mixing bowl. Whisk the baking soda, citric acid, cornstarch, and Epsom salt until they are completely blended. In a separate small container, mix your liquid ingredients water or witch hazel with a few drops of food coloring and essential oils. Slowly drizzle the liquid mixture into the dry ingredients while stirring continuously. The goal is to create a texture that feels like slightly damp sand you want it moist enough to hold together when squeezed but not so wet that it starts fizzing.
Here is a pro tip that will save your bath bomb project: work quickly and press down on any wet spots immediately. If the mixture starts to bubble or look too wet, add a bit more dry powder to balance it out. The perfect consistency is like slightly packed beach sand that holds its shape when you squeeze it but easily crumbles when touched. Get ready to shape your bath bombs and create some serious bath time magic!
Step 3: Shape and Mold Bath Bombs with Kids
Get ready for the most fun part of bath bomb making your kids are going to love this step! According to Childs Science, using silicone molds is the perfect way to help kids create their own unique bath bomb designs while keeping the process super easy and enjoyable.
Take your prepared mixture and start filling your silicone molds. Press the mixture firmly into each mold using your fingers or the back of a spoon. The key is to pack it down really tight you want the bath bomb to be compact and solid. If you are using different colored mixtures or want to create layered designs let each layer set for a few minutes before adding the next. For round bath bombs you will want to slightly overfill each half of the mold and then press the two sides together gently but firmly.
Here is a pro tip for making this a true family project let each kid choose their own colors and design their own bath bomb. Some might want sparkly pink ones while others prefer blue with glitter. Give them creative freedom but help them pack the mixture tightly. After molding leave the bath bombs to dry overnight in a cool dry place.
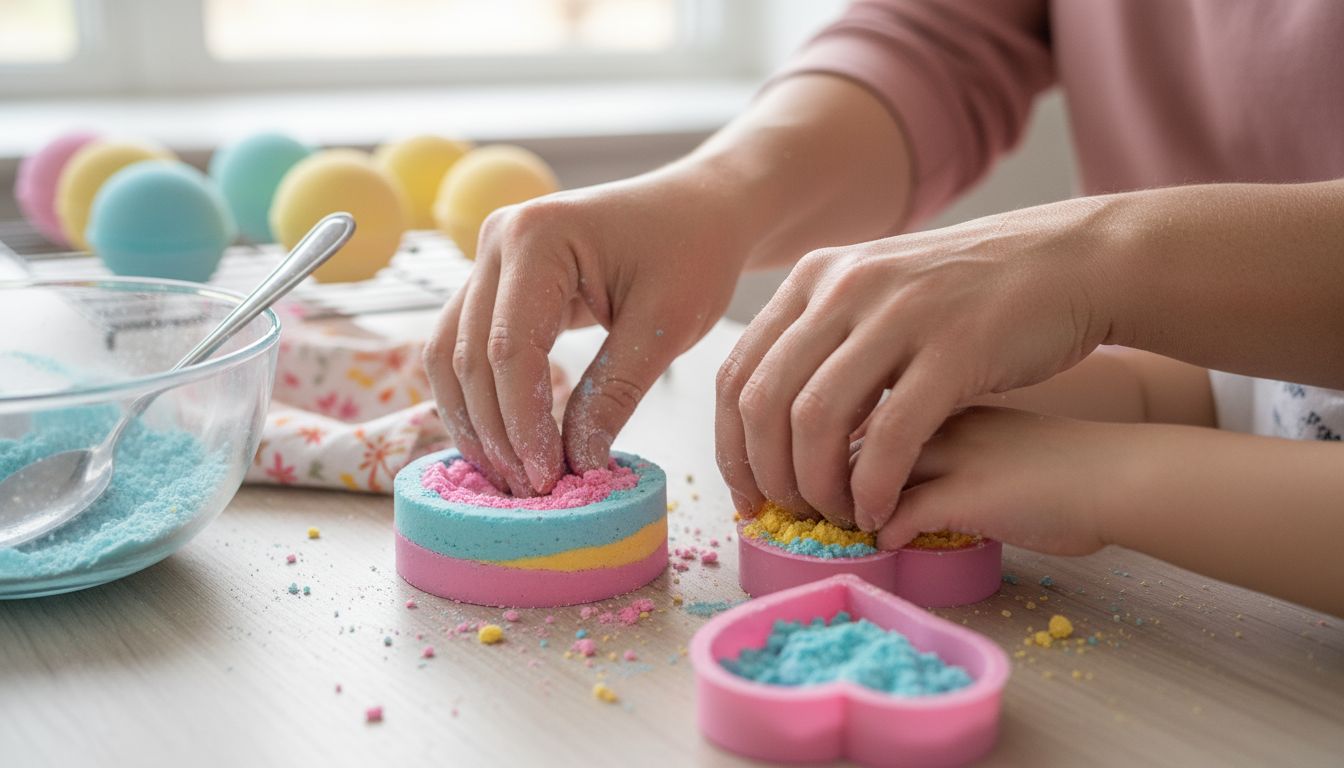 Once they are completely set gently tap them out of the molds and watch your little ones squeal with excitement about their homemade bath time creations!
Step 4: Dry and Set Bath Bombs Safely
The final stage of your bath bomb adventure is all about patience and careful handling. According to Childs Science, letting your bath bombs dry overnight is absolutely crucial for creating perfectly formed and functional fizzy bath treats.
Leave your bath bombs right in the silicone molds in a cool dry area away from direct sunlight or humidity. Choose a flat surface where they will not be disturbed and can set undisturbed for 12 to 24 hours. The setting process allows the ingredients to bond together and create a solid bath bomb that will dissolve beautifully in water. Resist the temptation to rush this process your bath bombs need time to harden completely.
One important pro tip never try to remove the bath bombs from their molds too quickly. Gently tap the molds and carefully release them only when they are completely dry and firm. If a bath bomb seems crumbly or soft wait a bit longer before removing. Once fully set store them in an airtight container away from moisture. Your homemade bath bombs are now ready to transform an ordinary bath into a magical sensory experience that will make bath time the most exciting part of your kids day!
Step 5: Test and Store Finished Bath Bombs
Congratulations on creating your very own bath bombs you are now officially a bath bomb making superhero! According to Childs Science, the final steps involve carefully testing your creations and storing them properly to preserve their magical fizzing power.
To test your bath bombs drop one into a bowl of water and watch the excitement unfold. Each bomb should create a spectacular fizzing reaction with vibrant colors swirling through the water. If the bath bomb crumbles before dissolving or does not fizz properly you might need to adjust your mixing technique in future batches. Store your finished bath bombs in an airtight container in a cool dry place away from moisture. A plastic container with a tight lid or a glass jar works perfectly keep them away from bathroom humidity which can trigger premature dissolving.
One pro tip for bath bomb storage make small labels with the date and ingredients so you can track your awesome creations. Each bath bomb is like a little science experiment waiting to bring joy and excitement to bath time. Get ready to impress your kids with these homemade treasures that transform an ordinary bath into an extraordinary adventure they will never forget!
Make Bath Time Fun and Your Home Organized with Simple Solutions
Creating homemade bath bombs is a fantastic way to bring joyful family moments together while inspiring creativity. Yet, the process can become overwhelming when balancing mixing, molding, and drying while keeping your space tidy and efficient. If clutter and time management feel like challenges as you dive into these fun projects, you are not alone. Many parents seek better ways to streamline busy family routines without sacrificing special experiences like crafting personalized bath bombs.
Discover practical hacks for organizing your crafting supplies and managing your project time to prevent frustration and keep the magic alive. Our proven strategies at Its a Southern Life Y’all help you create peaceful, organized spaces that support creativity and quality time. Ready to make bath bomb making a delightful, stress-free tradition? Explore productivity tips and home management ideas to balance fun and family life perfectly.
Take control now for a clutter-free crafting zone and make every bath bomb moment count!
Frequently Asked Questions
What ingredients do I need to create homemade bath bombs?
To create homemade bath bombs, gather baking soda, citric acid, cornstarch, Epsom salt, food coloring, and essential oils. Ensure all ingredients are dry before starting to prevent premature fizzing during the mixing process.
How do I achieve the perfect texture for my bath bomb mixture?
Aim for a consistency similar to slightly damp sand. Gradually mix your liquid ingredients into the dry ones, and adjust by adding more dry powder if the mixture looks too wet or starts fizzing.
Can my kids help with making bath bombs?
Yes, involving your kids in the process can make it a fun family project. Let them choose colors and designs for their bath bombs, and guide them in packing the mixture tightly into molds.
How long should I let the bath bombs dry before using them?
Let the bath bombs dry for 12 to 24 hours in their molds to ensure they harden properly. Avoid rushing this process, as it’s crucial for achieving a solid bath bomb that works well in water.
What’s the best way to store my finished bath bombs?
Store your completed bath bombs in an airtight container in a cool, dry place to maintain their freshness and fizzing ability. A plastic container with a tight lid can work well, keeping them away from moisture.
How can I test if my bath bombs are successful?
To test your bath bombs, drop one into a bowl of water and watch for a fizzing reaction. If it fizzes nicely and swirls colors, you’ve succeeded; if it crumbles or doesn’t fizz, check your mixing technique for future batches.
Recommended
- Easy Homemade Christmas Presents: Complete Guide – It’s a Southern Life Ya’ll
- Epsom Salt for Sunburn – It’s a Southern Life Ya’ll
- Cool Crafts for Kids to Make at Home –
- Glycerin Soap Benefits : Everything You Need to Know – It’s a Southern Life Ya’ll
Want a little more help with this? I made a free Mental Load Kit that pairs right up with this post — y’all can grab it over on my Free Resources page.