The Ultimate Guide On How To Create A Pinterest Business Account
Pinterest is a powerful tool that drives massive amounts of traffic to websites and blogs on a daily basis. If you are a blogger, you definitely want to have a Pinterest business account. But where do you start? Here you will find step-by-step directions on how to create a Pinterest business account.
(This post may contain affiliate links. What does that mean to you? Well, if you click on a product and make a purchase, I may receive some compensation at NO charge to you. If you want to read the boring stuff, my full disclosure can be found here.)
If you are more experienced with Pinterest and are looking to up your pinning game, I highly recommend Pinteresting Strategies by my good friend Carly. This is the course that gave me a new outlook on how to approach Pinterest and changed how I pin. Pinteresting Strategies is an ultimate gamechanger when it comes to Pinterest traffic. CLICK HERE if you are interested in the course to learn more.
If I’m being honest with you, Pinterest is absolutely my favorite way to drive traffic to my blog. Yes, I know SEO is king. But for faster results (and let’s face it, we are a right now society), Pinterest is the way to go for me.
Now when I started writing this post I truly thought it would be a simple “how to” article just walking you through the steps of setting up your Pinterest business account. But I couldn’t just do that because those steps can’t give you the full picture of Pinterest and how it relates to your business.
You see, where you might be new to Pinterest I have been a Pinterest fangirl since it was an invitation only site. Yes, we are talking about the beginning stages of Pinterest. I heard about it and jumped on the waitlist. With my background in television and marketing, this was revolutionary to me…and apparently, I wasn’t the only nerd geeking out over Pinterest.
What is Pinterest and Why do I need it?
I want to be clear from the getgo…Pinterest is NOT a social media channel. Pinterest is a visual search engine that packs a powerful punch when it comes to promoting your blog.
Why do I say this? Because Pinterest is chosen by 60% of online buyers over other search engines. (source)
Don’t you want a piece of that traffic pie? I know I do.
Let’s look at the stats: (source)
- 250 million people actively use Pinterest every month.
- Users have pinned 175 billion items on 3 billion virtual pinboards.
Not sure if your reader is on Pinterest? Let’s dig a little deeper into the demographics and see:
- 81% of Pinterest users are female. (source)
- 40% of new Pinterest signups are male. (source)
- 68 percent of U.S. women between the ages of 25 and 54 use Pinterest.
- Over half of Pinterest users and 75% of new signups are from outside the US. (source)
- Millennial use of Pinterest has increased more than any other social network—even Snapchat. (source)
- Though the median age of Pinterest users is 40, the majority of users are under 40. (source)
- 30% of social media users in the US are Pinterest users. (source)
How does that info look to you?
Because of all of this, I cringe when I hear bloggers state Pinterest takes up too much of their time. What? When I look at numbers like above and see that my blog is growing by leaps and bounds because of Pinterest traffic…I don’t mind spending time on Pinterest.
Oh! And the best part about Pinterest is that it is FREE! Yes, girl! This traffic source is free. You can’t beat that!
Why should you create a Pinterest business account instead of a personal account?
- You have access to Pinterest’s Built-In Analytics Dashboard.
- Business accounts have the ability to advertise with Promoted Pins and Buyable Pins.
- Your Pins are optimized for business by using Rich Pins.
- A business account will get access to new features before a personal account.
Pinterest Lingo Overview
Before we jump into the steps, lets first go over some Pinterest lingo:
- A Pin is when you share a visual on Pinterest.
- A Repin is when you share someone else’s pin you found on Pinterest (referred to as third-party pins).
- Boards are where you group pins together by topic.
- A Feed is a collection of content from other boards.
- Your Smart Feed is an interest and search based feed.
- Your Following Feed is curated by the pins of people you follow on Pinterest.
How do you Create a Pinterest Business Account?
If you plan to use Pinterest to market your business, you should create a Pinterest business account. Business accounts offer business-specific features that you will not find when using a personal account.
If you already have a personal Pinterest account, you can convert it to a business account (we will go over those steps further down) but some say there are pros and cons to this. I converted my personal account to a business account but I already had boards on my personal account that worked for my blog. This is something to carefully consider before you jump in.
If you are starting from scratch with your Pinterest business account, here are the steps to follow:
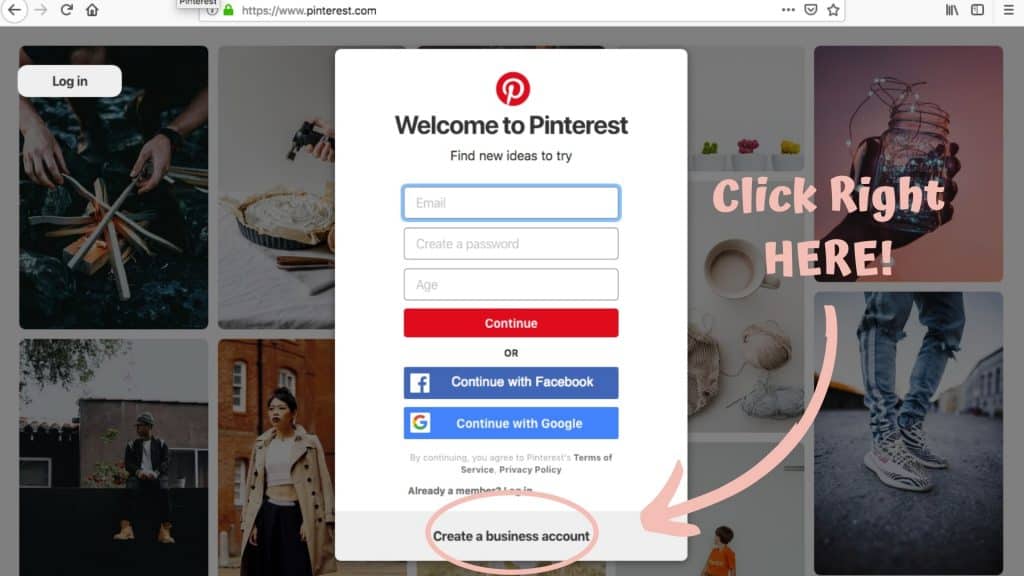
- Head on over to Pinterest and click on “Create a business account.”
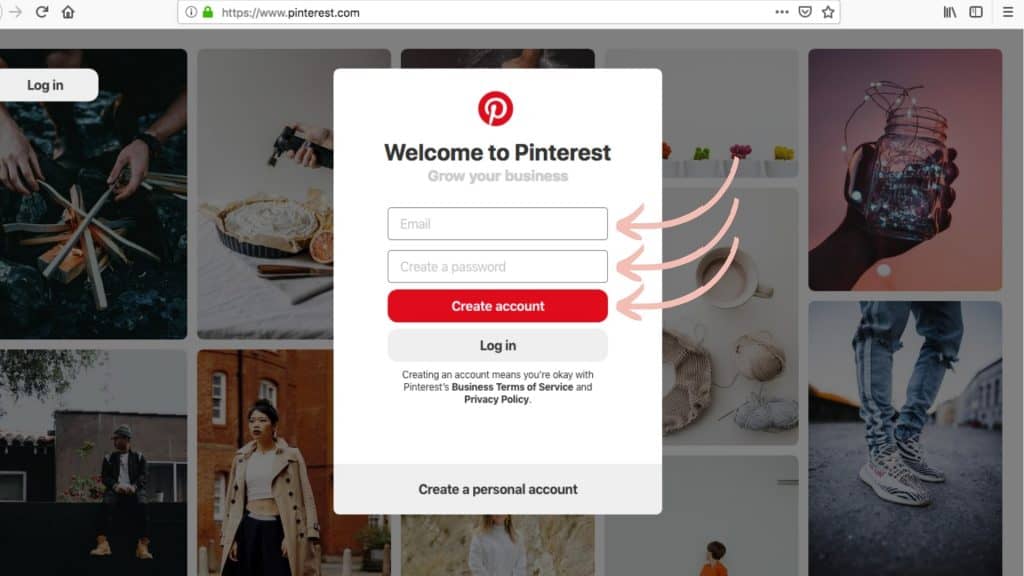
- Enter your email address and create a password. I strongly suggest you use your business email address.
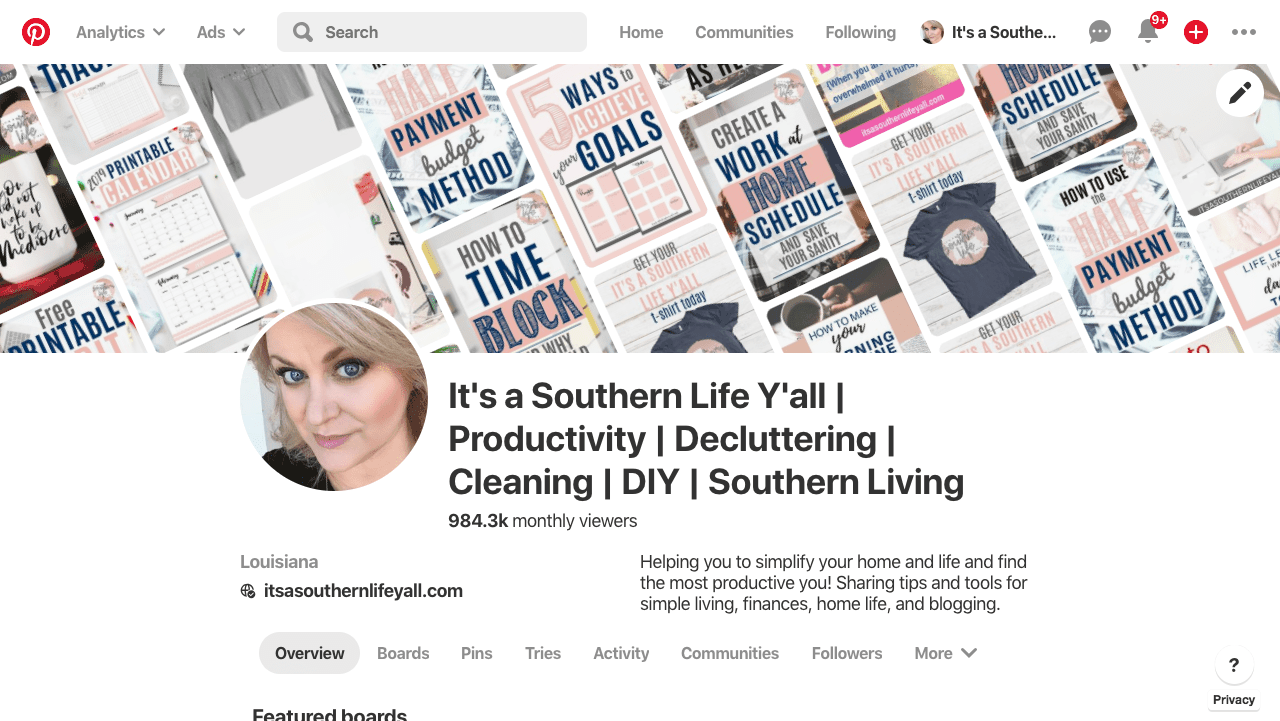
- Pinterest will then ask you to pick your username for your profile. This will become your Pinterest URL. You want to choose something as close to your business name as possible. I use pinterest.com/itsasouthernlifeyall/ (if you would like to follow me on Pinterest, just click that link).
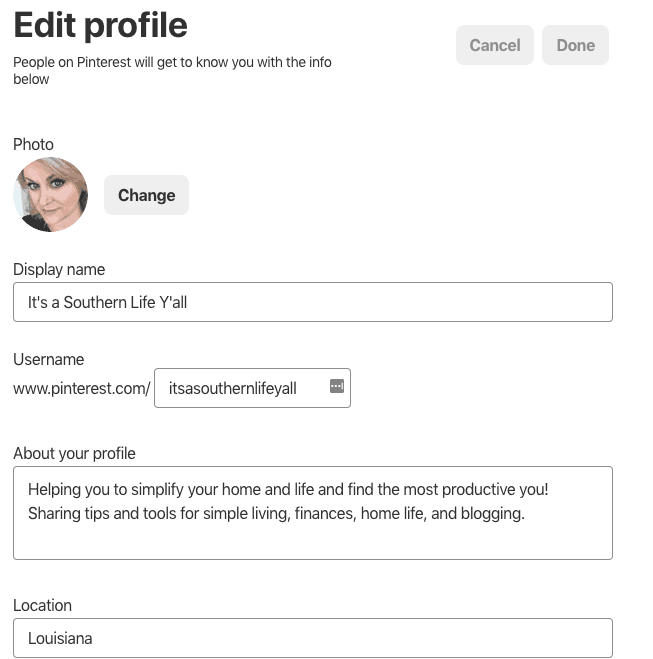
- Click on your settings and complete the account set up.
If you are converting your personal Pinterest account to a business Pinterest account:
Log into your personal Business account and click the 3 dots on the upper right side. Click on on the upgrade to a business account tab. Follow the steps provided. It really is that simple and free.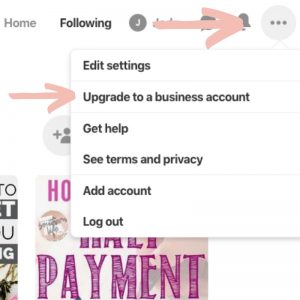
Tips on your profile settings when creating a Pinterest business account
Your profile picture is very important. You might see some people using their logo as their picture but I recommend you use a picture of YOU. Not just any picture of you but the same picture you are using on all of your business social media accounts. But you do want to be easily identified by viewers so if you are known by your logo, then use your logo.
Complete the about section by stating exactly who you are and what you do. You only have 30 characters, so put some thought into this section to make it perfect.
Claim your website
OK! Let’s claim your website so you can get all of the benefits of verifying your website’s authenticity.
There are a few different methods to do this but I am going to give you my choice of the easiest way.
- In the Claim Website section, enter your website URL (your complete URL) and click on Claim website.
- Select the Upload HTML file option.
- Download the file.
- Click Next.
- Head over to your website.
- Click on your Yoast SEO tab.
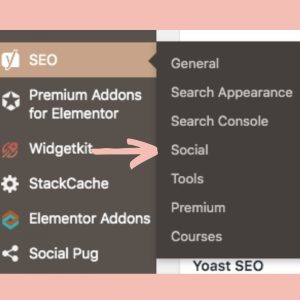
- Click on the social tab then the Pinterest tab across the top of the page.
- Paste your HTML code in the box provided.
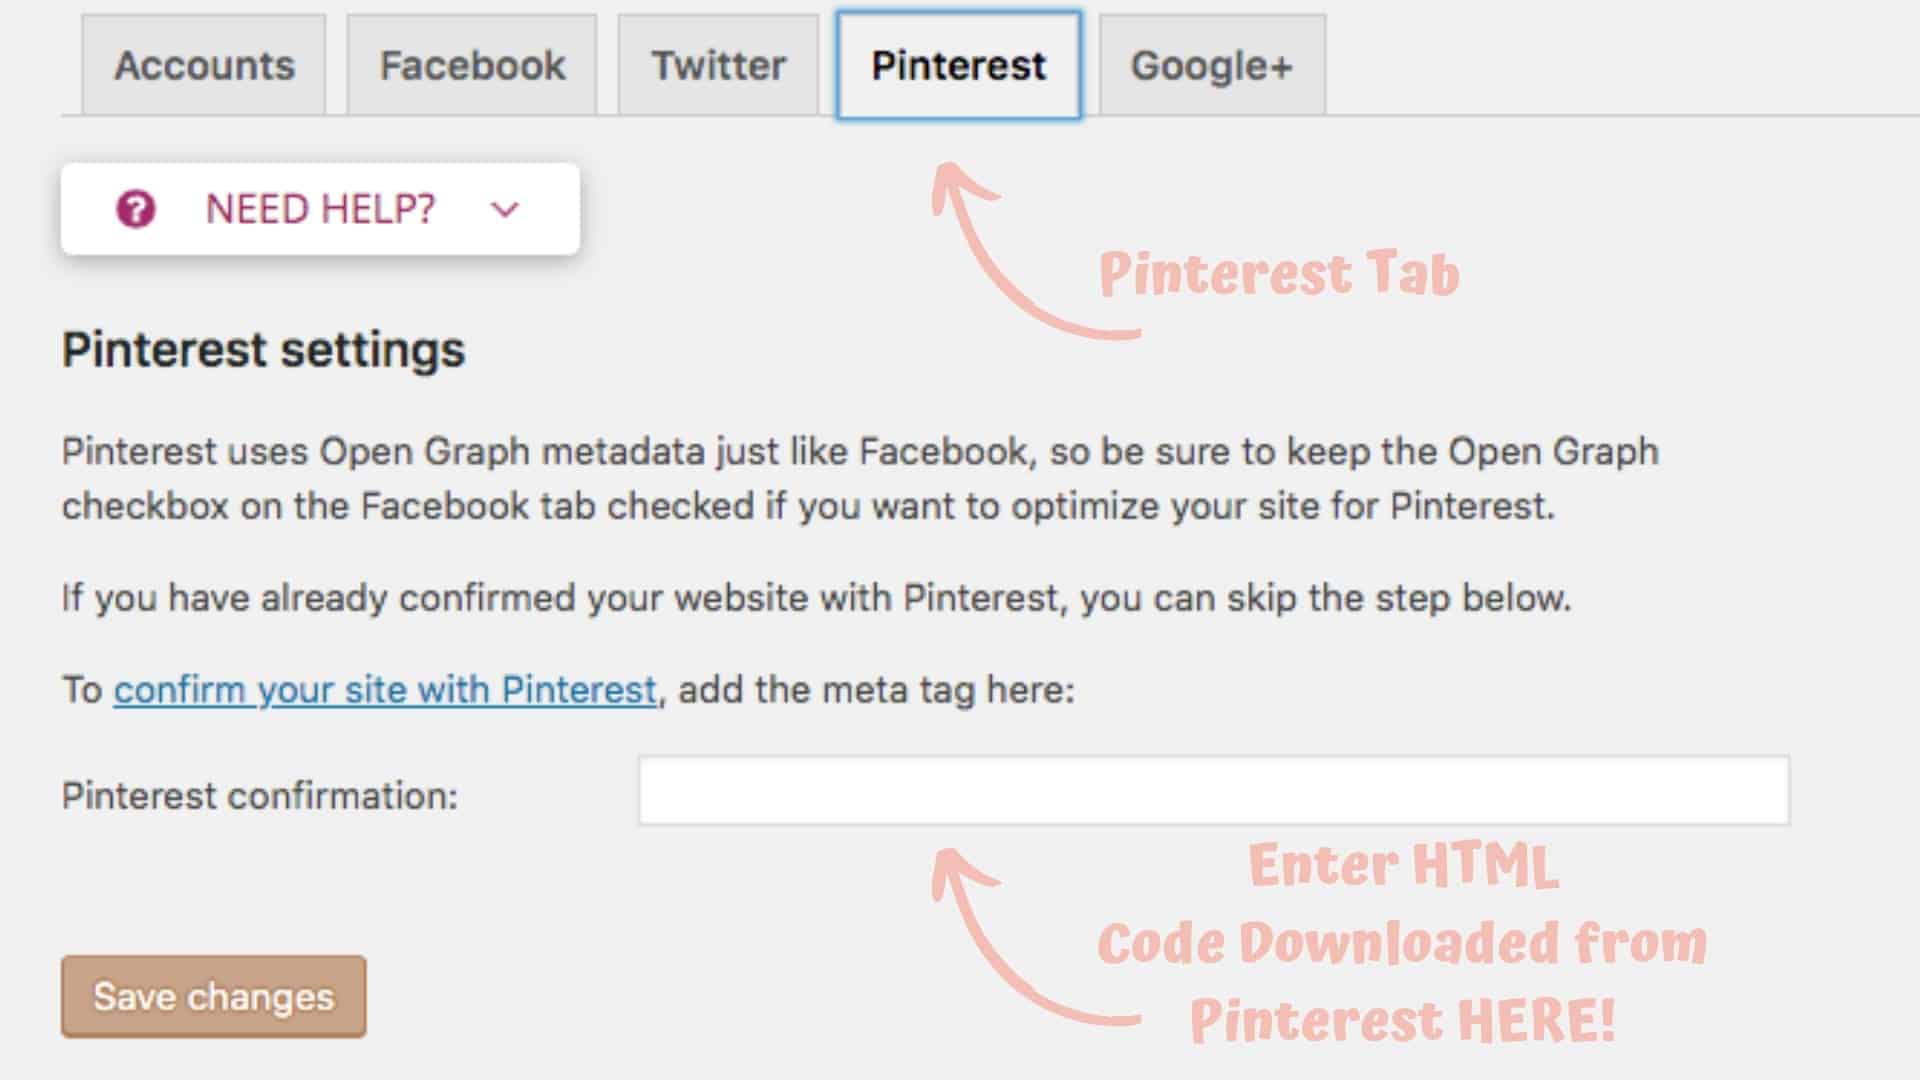
- Click on the Save Changes box.
But you are not finished yet! Head back over to Pinterest and get into your account settings. Click the red finish button and you are done!
Let’s talk about Rich Pins
What the heck are rich pins? Right?
Here is the explanation directly from Pinterest:
Rich Pins are a type of organic Pin format that provide more context about an idea by showing extra information directly on the Pin. Rich Pins are a free product available for anyone on Pinterest. You can identify Rich Pins by the extra information above and below the image on closeup and the bold title in grid.
Example of a regular pin: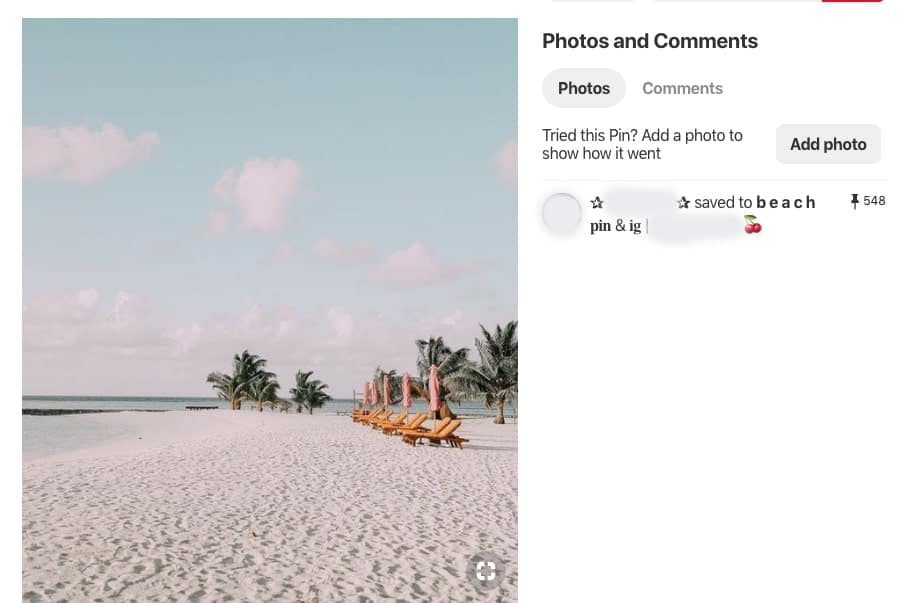
Example of a rich pin:
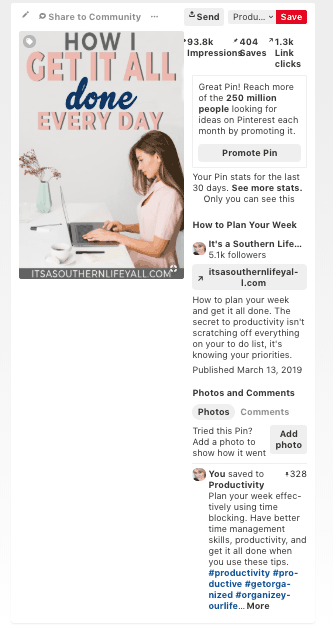
Do you see the difference in the details in the description? My pin (the rich pin) gives a thorough description and you are encouraged to “click through” to my blog to read more. You will also see stats on this pin which is a perk of verifying your website.
There are four categories for rich pins: product, article, app, and recipe.
Product rich pins include a price and product description on the pin.
Article rich pins include the blog title, post description, and author info. This is the rich pin category I picked.
App rich pins include an install button that redirects to the app store for downloading.
Recipe rich pins include recipe info like ingredients, serving size, cook time, and title.
How to set up rich pins
Again, the Yoast plugin makes this process super easy! But don’t worry, Pinterest has directions for other ways to set up rich pins if you need.
- Head over to your website.
- Click on your Yoast SEO tab as you did in the instructions above.
- Click on the social tab then the Facebook tab across the top of the page.
- Make sure that the Open Graph meta data button is enabled.
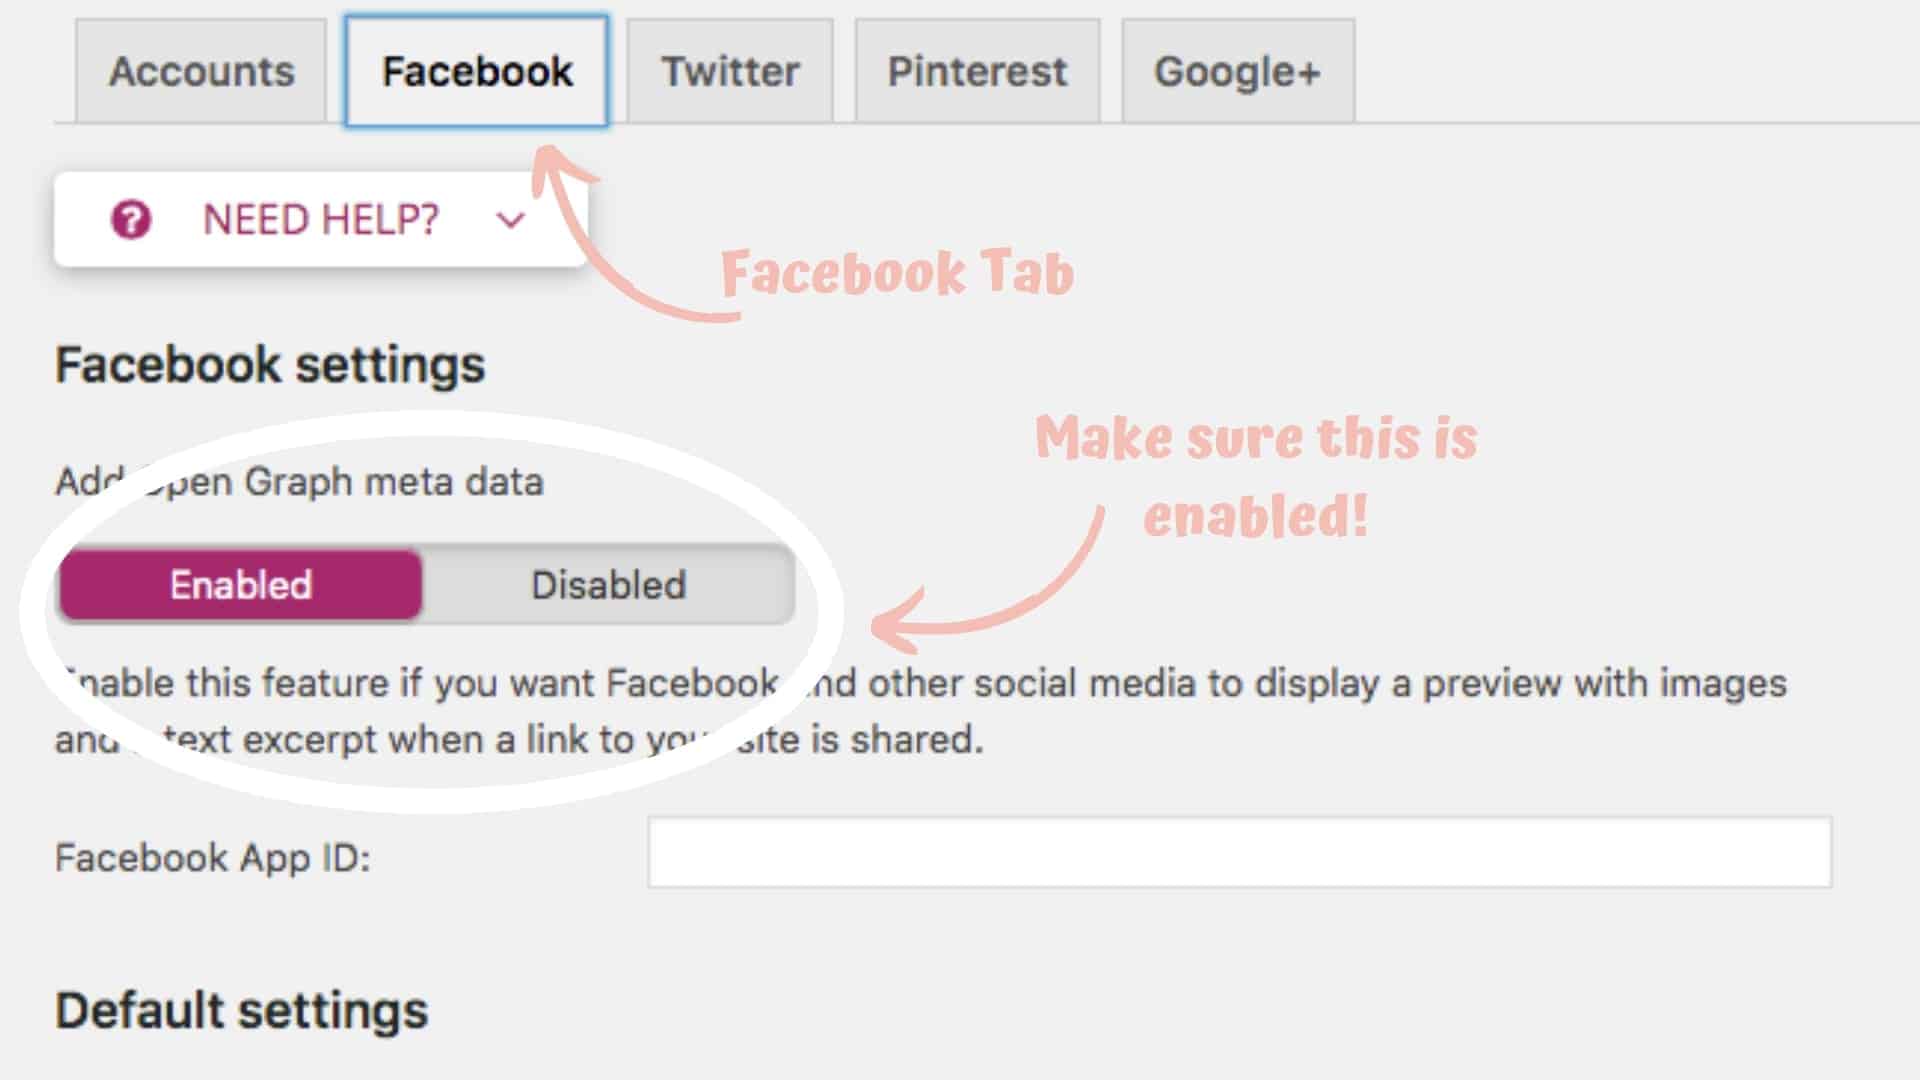
- Click on the Save Changes box.
- Go to one of your blog posts and copy the URL. You will need this for the next step.
The next step is to head over to the Pinterest Rich Pin Validator page to validate your website and apply for rich pins. Enter your copied URL (from above) into the box and click Validate.
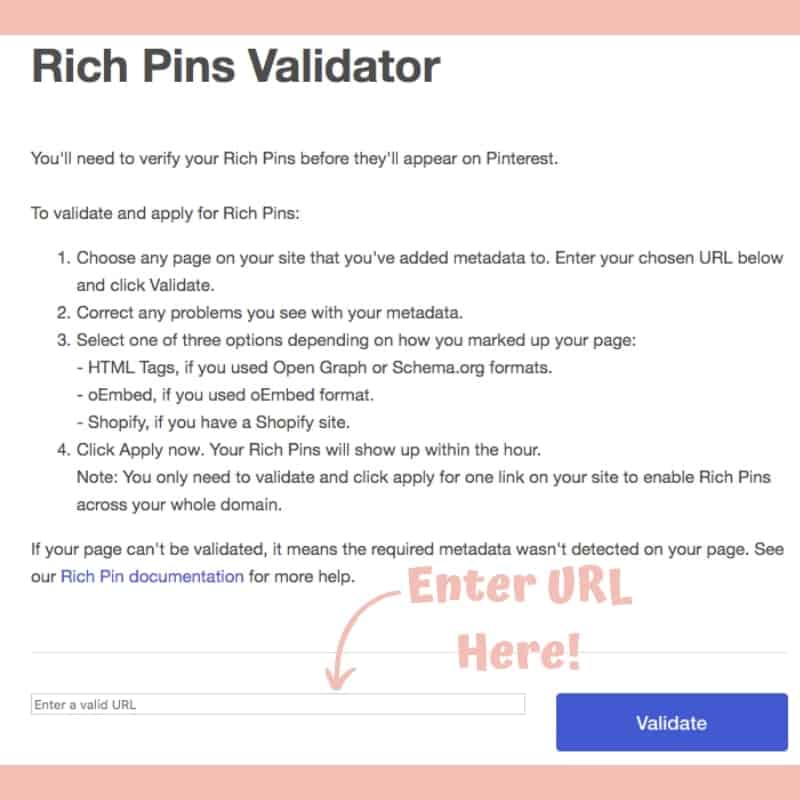
Once you click validate, a page will pop up with a button that says “Apply.” Click on that button, and that’s it!
Your pins will become rich pins within 24 hours of completing this process. It’s that simple.
Yay! Your Pinterest business account is now set up and ready to go.
If you have any questions feel free to use the comment section.
Leave a Reply