

Easy DIY Christmas Ornaments for Adults: A Cozy Craft Night Under $10 (15 Minutes Each)
The short answer
Easy DIY Christmas ornaments for adults come down to one supply run (twine, felt, wired ribbon, yarn, a bag of clear plastic balls and a glue gun, roughly $8 to $12 at a dollar store at the time of writing) and nine projects that each take about 15 minutes of hands-on time. Five are my own 2019 tutorials, linked below. Four are new. Put on a pot of cocoa, invite two friends, and you will each go home with a box of ornaments that look like they came from a boutique.
Hey, y’all! Every ornament in this post is about 15 minutes of hands-on time, and the whole supply list fits in one dollar-store basket for under $10 a person.
You know the moment. It is the first Friday in December, the tree is up, and when you step back it looks a little thin. Not bad. Thin. The ornaments you have are the ones you have had for years, and the pretty handmade ones at the craft fair were $14 apiece. You could fill a cart at the big-box store, but that is not the look you want and it is not the money you want to spend either.
Here is what I want you to know: the ornaments on my tree that get the most comments cost pennies and were made at my kitchen table with a glue gun and whatever was in the drawer. I have always thought the making should be an evening of its own, a pot of cocoa going and the radio on. That evening is the whole point of this post. The ornaments are the excuse. So this is a roundup of easy DIY Christmas ornaments for adults, planned as a craft night, and it finally gives my five favorite 2019 tutorials a home in one place next to four new dollar-store makes.
Why a craft night, and why the dollar store
A craft night gets the ornaments made, because a date on the calendar is harder to skip than “sometime this month,” and it gives your December one evening that is not a store, a school program or a to-do list. Two or three friends, each bringing one supply, is enough. Nobody needs to be crafty. Every project here is cut, wrap, glue, tie.
The dollar store matters because it takes the money worry off the table before you start. Felt, jute twine, wired ribbon, yarn, wooden beads, clear fillable ornaments, cinnamon sticks, a glue gun and glue sticks are all there, all year, for about a dollar and a quarter apiece at the time of writing. If you are decorating the rest of the house the same way, my hub for Dollar Tree Christmas DIY that looks boutique covers the mantel, the table and the door, and the same three rules apply here: two colors and one metallic, take the store look off every piece, and add one real texture.
The $10 supply run (one basket, one trip)
Split this list across whoever is coming. Three people, one trip each, and everybody has everything.
- Jute twine, one roll
- Felt sheets: cream, sage, one deep red or blush
- Wired ribbon, 1.5 inch, in your two colors
- One skein of yarn (any cream or neutral works for all of these)
- Clear plastic fillable ornaments, one pack
- Faux greenery picks, cranberry picks or tiny pinecones
- Cinnamon sticks (the spice aisle, or the floral aisle in December)
- Wooden beads, one bag
- A glue gun and glue sticks, scissors, a cardboard scrap, cotton balls
At the time of writing that is about $8 to $12 per person at a dollar store, and most of it is left over for next year. Any dollar-store aisle carries all of it.
Want the craft that lights up the whole table?
The free Mason Jar Magic Workshop Kit is my own frosted-jar luminary project, with the printable wraps and the step-by-step. It is the easiest “wow” on a craft night and it uses the same dollar-store jars.
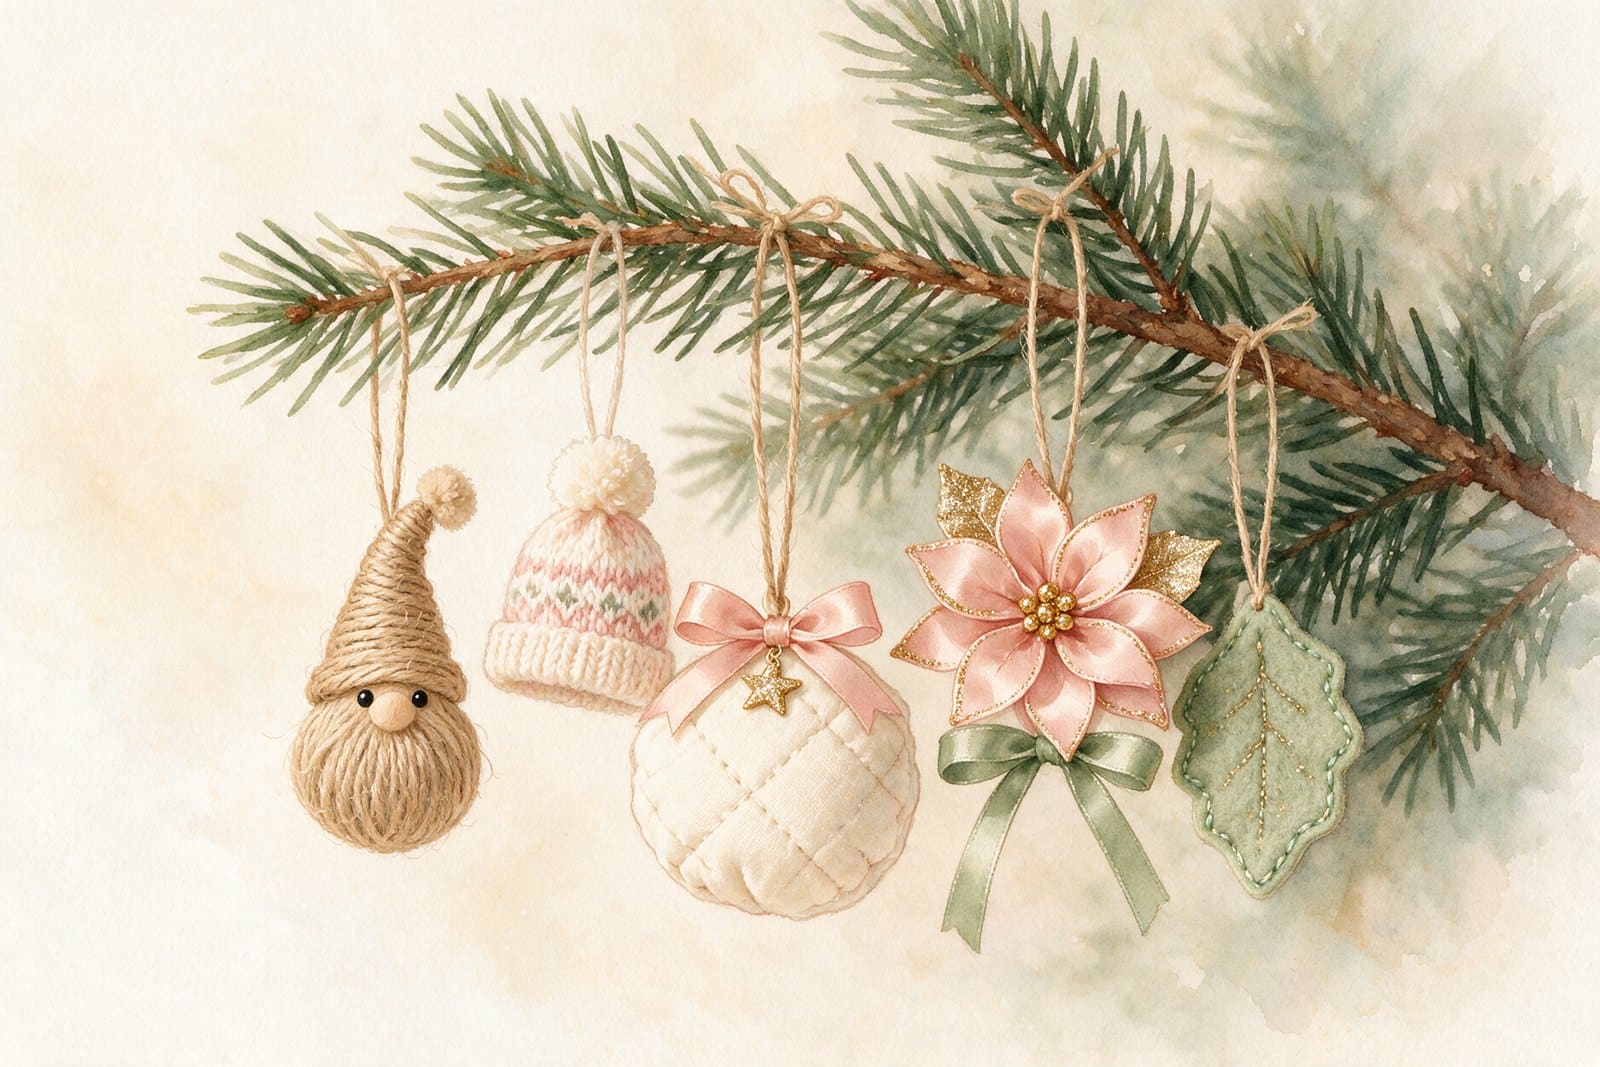
Five easy DIY Christmas ornaments from my own tree
These five are from my 12 Days of Christmas Crafts back in 2019. Each gets the short version here and a link to the full tutorial with step photos.
1. The twine gnome
Wrap jute twine around a scrap of cardboard about thirty times, tie off the top, slide it off and trim the bottom into a beard. A triangle of felt or fabric scrap makes the hat; a wooden bead is the nose. He hangs from a loop of the same twine. Fifteen minutes, pennies, and people will ask where you bought him. Full steps: DIY rustic gnome Christmas tree ornaments.
2. The mini yarn winter hat
Cut a half-inch ring off a cardboard tube, loop about forty 9-inch pieces of yarn around the ring until it is covered, push the ends through the middle and cinch the top. Trim the ends into a pom-pom and tuck a cotton ball inside so it holds its shape. Make a dozen in different colors and string them into a garland. Full steps: mini winter hat ornament.
3. The white fabric-square ball
This is the one with the boutique look. Makeup-remover cotton rounds, folded into quarters and pinned into a foam ball in rows, make an all-white textured ornament that looks like it cost $20. It is the slow one of the five, so give it two 15-minute rounds, or make it the project you keep going while everybody talks. Full steps: repurposed cotton square ornament.
4. The ribbon poinsettia
Wired ribbon folded into petals, layered on a pipe cleaner center and finished with gold beads. It works on the tree, on a wreath, or tucked into a gift bow. One length of ribbon makes two. Full steps: DIY ribbon poinsettia.
5. The farmhouse felt leaf
Trace a leaf shape onto felt, cut two, stitch or glue them with a twine loop between, and add a line of gold thread down the middle for the vein. There is a second leaf pattern in the post and a garland version at the end. Full steps: farmhouse felt leaf ornaments.
Four new dollar-store ornaments for the same night
6. The greenery-filled clear ball
Pop the cap off a clear plastic ornament, snip a faux greenery pick into inch-long pieces, and drop them in with three or four faux cranberries or a pinch of the tiny pinecones. Cap it, tie a wired-ribbon bow at the top. Two minutes each, so make a dozen; they are the fillers that make a thin tree look full. Total cost for a dozen runs about $4 at the time of writing.
7. The cinnamon-stick bundle
Three cinnamon sticks, tied together with twine, a small wired-ribbon bow glued over the knot, a sprig of greenery tucked behind the bow. Hang it from a twine loop. The tree smells like December every time the heat kicks on. Six bundles from one package.
8. The wooden-bead star
Thread five wooden beads onto a piece of wire or a pipe cleaner, twist the ends to close the loop, then pinch five points to make a star. Tie a twine hanger to one point. Leave the beads natural, or rub one side with a little gold craft paint for the metallic touch. Fifteen minutes makes three.
9. The felt-wrapped ball
Cut felt into 1-inch strips and hot-glue them around a plastic ornament in overlapping bands, like wrapping a present. Finish with a twine loop and one bead at the top. It covers the shiny plastic look completely and gives you a matte ornament in your two colors, which is the single easiest way to make a mixed tree look planned.
DIY Christmas ornaments from paper (the no-glue-gun option)
If someone at the table does not want a glue gun, paper is the answer. A dollar-store scrapbook pad or a roll of kraft paper covers all three.
The accordion fan circle. Fold a 12-by-3-inch strip of paper into half-inch pleats, fold the pleated strip in half, glue the two inside edges together, then open it into a circle and glue the last seam. A button or bead in the center, a thread loop at the top. Two strips, two colors, and you have a layered rosette.
The paper-strip ball. Cut eight strips, 1 by 8 inches. Stack them, punch a hole through each end, run a brad or a piece of twine through, then fan the strips out and around until the ends meet to form a sphere. Fifteen minutes makes four.
The kraft-paper star. Cut two identical five-point stars, score and fold each along the lines from point to center so it stands up in relief, then glue them back to back with a twine loop between. Brown paper and twine read as farmhouse; a little white paint dotted on the edges reads as snow.
Make extra paper stars for gift tags; tied on with twine they beat anything you can buy, and that is where my Dollar Tree DIY Christmas gifts post picks up.
How to run the craft night in 15-minute rounds
This plan keeps a table of three or four adults happy for two hours.
- Before anyone arrives (15 minutes): cover the table with a cheap plastic cloth or kraft paper, put the glue gun on a plate, set the scissors and twine in the middle, and get the cocoa going. One plate of something to eat that does not need a fork.
- Round one, the fillers: everybody makes the greenery balls and cinnamon bundles first. They are the fast wins, and the table relaxes once people see something finished.
- Round two, the twine and yarn: gnomes and winter hats. These are the talking projects; your hands are busy and your mouth is free.
- Round three, pick your slow one: the cotton-square ball, the ribbon poinsettia or the bead star. Whoever finishes early makes a felt leaf.
- Last 15 minutes: everybody lays her ornaments on a tray, one photo for the group text, then each person packs hers into a tissue-lined shoebox.
If you want the room to glow while you work, the mason jar luminaries from earlier in this series are a 15-minute first round of their own, and they make the night feel like an occasion. If one friend wants a bigger make, the dollar-store Christmas wreath is it.
Is this a kids’ craft night too?
This one is for the grown-ups; a glue gun and two uninterrupted hours are the gift. The paper ornaments, greenery balls and felt leaves work for a second, shorter session with Big Kids (8–10) and up. Littles and Early Elementary stay on the glue-stick end, no glue gun in reach.
When it goes sideways
The glue gun will drip. Somebody’s gnome will look like a potato. The yarn hats will come out three sizes. None of that is a problem. Handmade ornaments are supposed to look handmade, and twelve slightly different twine gnomes is the exact look people pay $14 apiece for at the craft fair.
If you run out of time, stop. Pack what is finished, keep the supplies in one shoebox, and give yourself one more 15-minute round on a weeknight. If the whole thing was more than this December had room for, that is a season, not a failure. Hang the ones you made and let the tree be a little thin this year. Done is better than perfect, and it still smells like cinnamon.
Ready to make your table glow first?
Start the night with my frosted mason jar luminaries. The free Mason Jar Magic Workshop Kit has the printable wraps, the supply list and the three finishes, and everything in it is dollar-store.
One more thing, for the mom whose December is a list
A craft night only happens if an evening is kept free for it, and in December that takes deciding on purpose. If you want the whole season on one page, gifts by person, the two calendars, the meals and who is coming when, The Homefire Holiday Season Planner ($24.97) carries Thanksgiving through New Year’s in 15-minute sessions, printable, fillable and as an app. I built it so that nights like this one get a square on the calendar instead of a “maybe.”
Frequently asked questions
What is the easiest DIY Christmas ornament for a beginner?
The greenery-filled clear ball. Open it, drop in snipped greenery and a few cranberries, close it, tie a bow. Two minutes and no glue gun. The cinnamon-stick bundle is a close second.
How much does it cost to make your own Christmas ornaments?
For the nine projects here, about $8 to $12 per person at a dollar store at the time of writing, with supplies left over. A finished ornament works out to well under a dollar.
What supplies do I need for a Christmas ornament craft night?
Twine, felt, wired ribbon, yarn, clear fillable ornaments, a greenery pick, cinnamon sticks, wooden beads, a glue gun, scissors and cotton balls. Split the list across your guests so each person makes one trip.
How do I make dollar-store ornaments look expensive?
Pick two colors and one metallic for the whole set, cover anything shiny-plastic with felt, ribbon or twine, and add one natural texture like greenery, cinnamon or wood. Matching matters more than cost.
Back to that thin tree on the first Friday in December. Text two friends, pick a night, and put the list above on the fridge. One evening, one basket of dollar-store supplies, and the tree will be full, and so will the evening.
Keep tending the fire, y’all.
Want a little more help with this? The Homefire Holiday Season Planner keeps your craft nights, gift list and holiday budget in one place, from Thanksgiving to New Year’s.